Babies
strange, weird, "what do you have against children"
|
Want to skip straight to the good part?
Or, read on to find out how they're made! |
What the hell made you think of that?
|
I get bored. Fairly easily. And I really like to make things.
Back in college, I loved to sit behind the table during pottery sales and listen to people talk about the pots laid out before them; "Oooooh, this one is nice!", "This would be good for my coffee", "I love that color!", and then "well, that's ...weird". Sitting behind the table gave me anonymity; and I heard a lot of interesting comments. Most positive, but some were a bit more ...critical - "who would make something like that?", "someone has a strange sense of humor" and all that. It was immensely amusing for me to speak up at that point, and watch people back-pedal. While it is no longer as easy to hide behind the table, I still thoroughly enjoy watching people's reactions. Some people are grossed out, some won't even step foot into my booth at art fairs - but many more walk in and laugh. And then usually find a piece or two that appeals to them. (And often make comments about Toy Story.) Now as I am working, I am usually laughing. Assembling pieces and parts in new and interesting ways keeps me very entertained. And late at night, the laughter startles the dogs. Which also amuses me. |
So, uh, do you mold each of these by hand?
|
Oh, hell no.
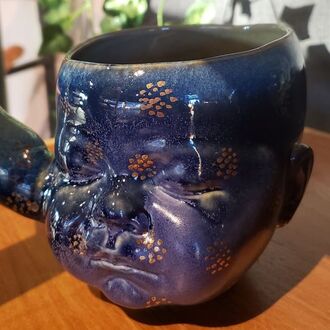
Short version - I have a bunch of doll-makers molds that I pour a liquid clay called slip into. I then alter and decorate. Once they have dried sufficiently, they are put into their first firing (the bisque), then they are glazed and fired again. Some pieces get additional decoration of decals or lusters and then are fired a third or even a fourth time. |
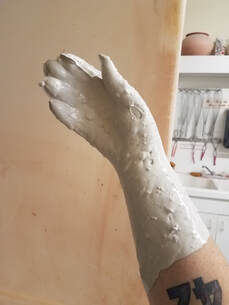 thick, yet oddly pourable
The long, somewhat technical version:
The slip - I start by making my own casting slip. I save all of my trimmings from my other line of work and let them get as dry as possible. Once sufficiently dry, I weigh the trimmings and add enough hot water to get to around the specific gravity of 1.8. Specific gravity is essentially the measure of how much ‘stuff’ is suspended in the water. Water itself has a specific gravity of 1.0, so I am looking for something that is pretty thick. After letting the water/clay mix hang out for a day or so (to make sure that it has gotten as soaked through as possible), it all gets mixed up using a drill and large paint mixing bit. Because it needs to be relatively thick, but still pourable, I then add a chemical called Darvan-7. Darvan-7 is a super-magic thing that basically makes the slip more ...slippy. It essentially makes the clay particles disperse better through the water, and therefore more pourable - without adding extra water to the mix. Extra water would take too long to absorb into the plaster mold, as well as making the turn-around time for that mold too long. And over time, the molds will disintegrate faster if too much water is used.
The slip - I start by making my own casting slip. I save all of my trimmings from my other line of work and let them get as dry as possible. Once sufficiently dry, I weigh the trimmings and add enough hot water to get to around the specific gravity of 1.8. Specific gravity is essentially the measure of how much ‘stuff’ is suspended in the water. Water itself has a specific gravity of 1.0, so I am looking for something that is pretty thick. After letting the water/clay mix hang out for a day or so (to make sure that it has gotten as soaked through as possible), it all gets mixed up using a drill and large paint mixing bit. Because it needs to be relatively thick, but still pourable, I then add a chemical called Darvan-7. Darvan-7 is a super-magic thing that basically makes the slip more ...slippy. It essentially makes the clay particles disperse better through the water, and therefore more pourable - without adding extra water to the mix. Extra water would take too long to absorb into the plaster mold, as well as making the turn-around time for that mold too long. And over time, the molds will disintegrate faster if too much water is used.
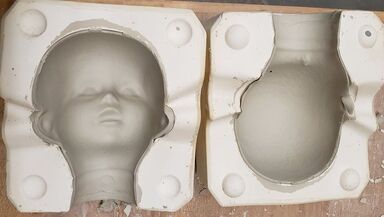
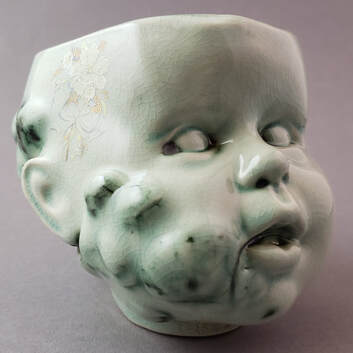
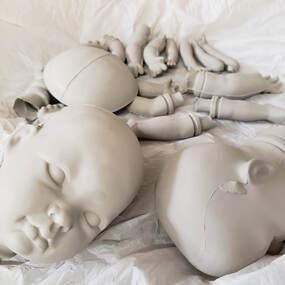
The casting process - I have a wide variety of doll-head and appendage molds for all size dolls. I generally use the same 7 or so over and over, though I have many, many more. Molds are generally two pieces, and held together with a large strong rubber band, or a band that is similar to a ratchet strap. The slip is poured in, full to the top, and then let to set for a certain amount of time. The time varies greatly depending on the density of the plaster that the mold is made of, as well as the wetness of the mold and the humidity of the air - but essentially what I am looking for is a certain thickness at the sides where the water has been absorbed into the plaster. That outside edge will form a shell of solid clay, then the inside (still liquid) slip is carefully poured back out. I then let this shell sit in the plaster for another 24 hours or more, until it has hardened sufficiently enough to remove from the plaster. After that, the molds are left to dry and the resulting cast is mutilated. This image is an example of what can happen when your piece is still too wet to be opened up (whoops).
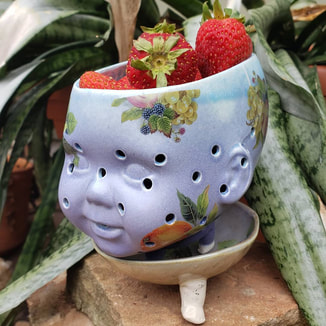
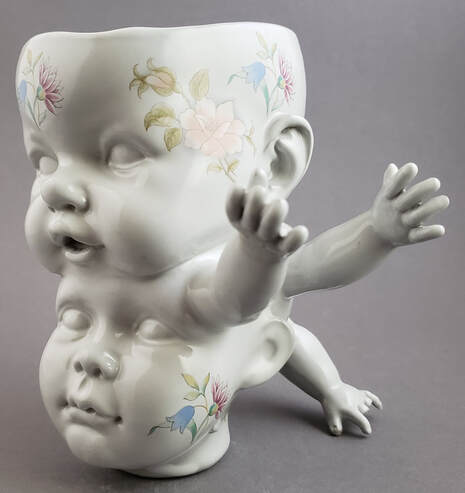
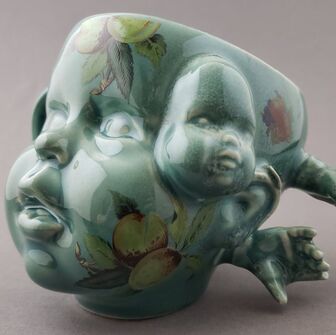
The alterations - Most all of the baby heads get their top cut off to make them into cups or planters. Some will get only small holes cut so that they can be stacked and altered into vases. Once the bottom is cut, the inside wall of the head is scratched up, wet down, then scratched again (known as slipping and scoring). They are then set on a flat level plaster surface, and additional casting slip is poured in. The head is then rocked around to make sure that the slip gets into the scratches, and a paint brush is used to bring a bit of slip up the inside wall of the head. The heads are then left for their bottoms to dry, while covered so that the walls and bottom of the head reach the same moisture level. After that, some just have their edges cleaned up, and some get arms/legs/appendages/heads added to them to make them more sculptural. This is also done using slipping and scoring. Any piece with appendages has to dry for quite a while under wraps to make sure that the pieces dry at the same rate and do not crack off. Added pieces that are hollow will get a small, inconspicuous, hole placed in them. This is to prevent them from blowing up later as they are fired in the kiln.
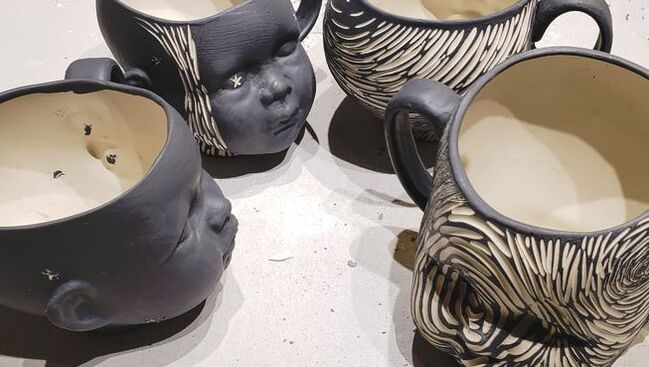
The decoration - Many pieces will get added decoration.
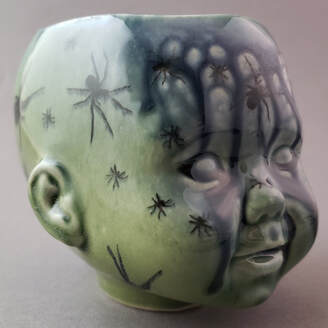
One type of decoration that I favor is called sgraffito. Once the pieces are at a certain level of dryness, a layer of colored slip is painted over the base. Again left to dry, the colored slip is carved back through to reveal the clay underneath.
I also enjoy screen printing on my ceramics. I've made drawings of various bugs and miscellaneous; then made into a screen. A thickened underglaze is then pushed through the screen. Screen printing is usually done after the piece has gone through its first firing already. If the underglaze print is not refired (just to bisque), the print tends to run. Sometimes I do this intentionally, but I will also refire the piece to ‘set’ the underglaze. I will also use carving techniques and anything else that works with the piece.
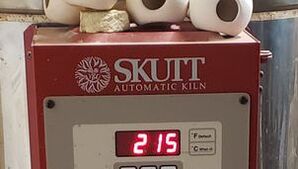
The first firing - This firing is called a bisque firing, and the purpose is to drive out any remaining moisture. The clay body also undergoes a chemical change at the same time, making it hard and unable to break back down in water. At this point, this piece is not water-tight or able to be used for food. More decorations can be added after this firing, though not as many as before the firing. The bisque firing is done slowly, generally with a preheat (holding the kiln around 200F) of at least four hours. After the preheat, the kiln can climb a bit faster, and will ultimately reach around 1737F. It is then left to cool. All told, this first firing will take at least 8 hours, not including the preheat.
|
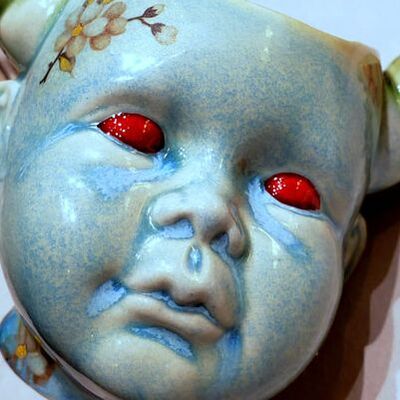
Glazing - All of the glazes used on my work are food-safe, though I do only use certain glazes on the inside of food-safe work, as they are less resistant to scratching. I generally pour a glaze into the inside of all pieces, then spray layers on the outside. My glazes are generally kept at a specific gravity of 1.3-1.5, in order to make them pour well. My glazes on this line of work are usually fired to cone 6 - or about 2200F. This firing usually runs around 4-5 hours, depending on the ambient temperature and how tightly the kiln is packed.
|
|
Aftercare -
Once pieces are cooled enough, some are just set aside for a final sanding of the bottom. I sand first with a 220 grit sanding sponge, then with a 300 grit sanding sponge. Other pieces get pulled to add decals or lusters/overglaze to. I scour Ebay and sale sites to find (primarily) vintage decals. Decals are a mixture of pigments and a binding agent, which is printed onto paper. The paper is then soaked in warm water to remove the paper backing, and gently placed onto a clean area of the work. The process is repeated, decals are cut up and combined together, all to make whatever design I think works best. Lusters are a mixture of real metal and binding agents, and are painted on. The chemical itself is quite a toxic substance, and adequate ventilation must be provided during application and the firing of the work. Decals and lusters are both refired to a much lower temperature, and designed to sink into the top layer of glaze as it just begins to re-melt. Too hot, and the additions will just burn out. Too cold of a firing, and the decals and lusters will run off later. I have found a happy medium of cone 018 (about 1250F) to be overall the best. Some decals (primarily the older ones with red) may still burn off, but they can be replaced and refired if that happens. I do a quick “rub test” while pulling pieces out of the kiln to make sure that the additions are adhered correctly. As long as all is good, these pieces are then also sanded on the bottom until smooth. Decals and lusters both will make a piece *technically* not dishwasher safe - this is because over time, the top layer of your piece will wear off and the dishwasher speeds this process up. It does not diminish the general food-safe-ness (that’s totally a word), as decals and lusters are not put on the inside or within a margin of the lip of the cup. In practicality, it all depends on your dishwasher and how well the piece was fired. Personally, I have run a piece 30+ times and not seen a difference. Though I do still hand wash all the pieces that I really care about; running a piece through on accident should not be harmful. Decals are *geneally* microwave safe, though if they look metallic at all, they may contain metal as well. Lusters are NOT microwave safe. Just don’t do it. Really. I haven’t tried it, and I am not going to. That shit is expensive. |
